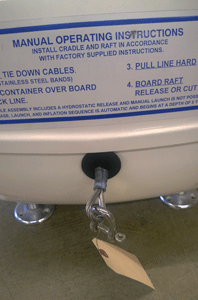
Installation of a hydrostatic release on a Switlik flat container cradle
Installing a Hammar hydrostatic release on a Switlik flat container life raft cradle takes a bit of instruction. I will attempt to make it as easy as possible
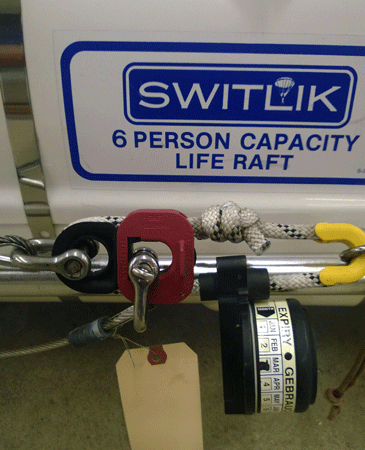
First let's look your the hydrostatic release. It has three attachment points):
The yellow thimble labeled "Snap Shackle"
The red weak link marked "Painter"
The black thimble marked "Deck"
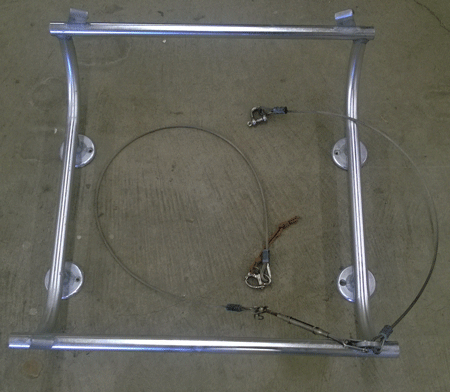 Now look at your cradle before you put the life raft in to it. There are two cables.
One (on the left in the picture) is attached to the cradle with a turnbuckle and has a snap shackle at the other end.
The second cable (on the right in the picture) is permanently attached to the cradle and has a stainless steel shackle at the other end.
Finally there are three "ears" for the cable to go under (upper left, upper right and lower left in the picture). You need to make sure that these "ears" have not been bent closed and that the cable can freely enter and exit them.
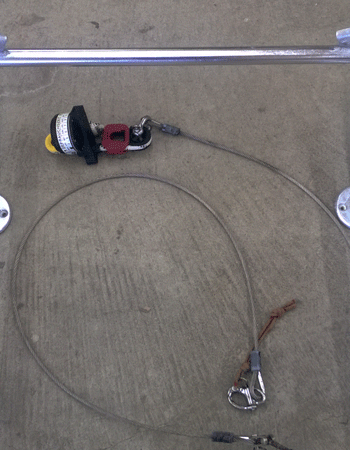 You can attach your Hammar hydrostatic release (which I will now refer to as the HRU). The permanently affixed cable is shackled to the black thimble on the HRU that is marked "Deck".
Hopefully by now this is beginning to make a bit of sense and you see that the HRU is color coded to help in your efforts.
We are now going to place the raft in to the cradle and the pictures will be looking in the opposite direction (just to make things confusing!).
To make things easier, extend the turnbuckle to its full length so you won't have to fight with the cables in the next step.
With the raft in the cradle take the two cables and route them as follows:
The one with the HRU goes directly over the raft and under the ear on the other side.
The one with the turnbuckle and snapshackle goes along the "back" of the raft, under an ear, over the top of the raft and under the ear on the "front". Finally the hook the snap shackle through the yellow thimble on the HRU.
Once you have completed this tighten up the turnbuckle and install the "keepers" so it doesn't come loose.
 Connecting the painter is the final piece of this puzzle. Often when you get your raft back from being serviced the painter cable is stuffed back in to the container. This makes it easier to transport the raft but impossible to install it. You need to carefully pull the stainless steel cable out until you have enough to reach around to the HRU. If you see rope, stop! There is plenty of cable there and it should come out easily.
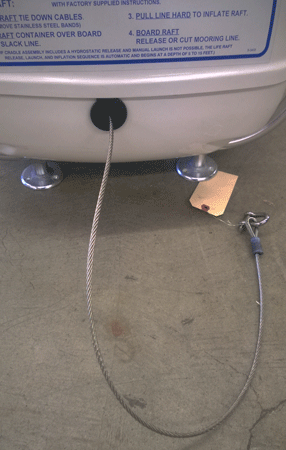 Your cable should now look like this picture.
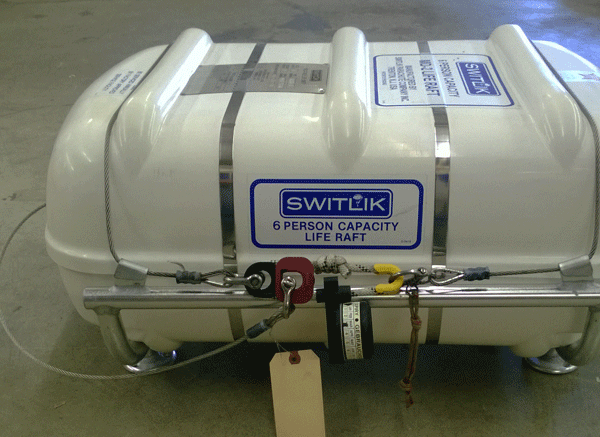
 Take the shackle at the end of the painter cable and hook it through the red "weak link" in the HRU which is marked "Painter". Bravo! You are finished!
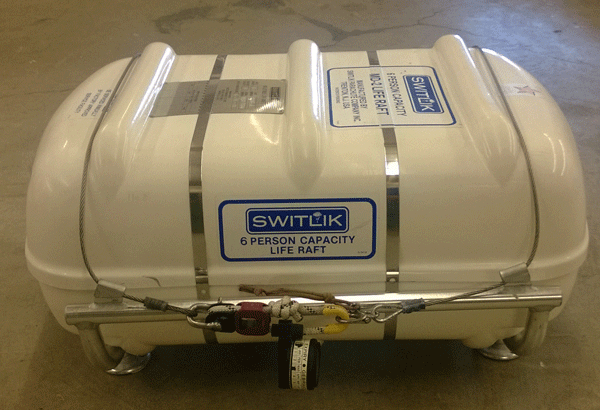
Below are two images, one from each side of the life raft showing a completed installation. Yours should look like this. Notice how tightening up the turnbuckle has put the HRU under a bit of tension.
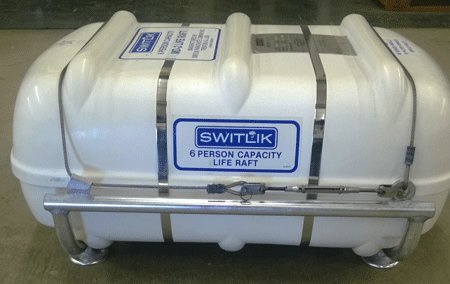
Does it matter which way the raft goes in to the cradle? Not really but if it is mounted fore and aft have the painter exit to the stern, your raft will stay dryer. As you can see there is plenty of cable to handle either orientation.